The bathroom is a space where we begin and end our days, so creating a functional and harmonious space is crucial.. Whether you’re renovating your current bathroom or building a new one from scratch, choosing the right layout can greatly enhance both the aesthetics and functionality of the space. Let’s delve into three ideal bathroom layouts that cater to various needs and design preferences.
The Classic Single-Wall Layout:
The single-wall bathroom layout is a timeless option that works well for smaller spaces or when you want to keep everything within arm’s reach. This layout features all the essential fixtures – the toilet, sink, and shower or bathtub – aligned along a single wall. This design creates a clean and uncluttered appearance while maximizing the use of space. Consider installing a corner shower or a compact bathtub to optimize available space.
Pros:
Efficient use of space, making it ideal for smaller bathrooms.
Provides a clean and organized look.
Simplified plumbing and electrical work due to the proximity of fixtures.
Cons:
Limited space for additional storage or separate vanity area.
Can feel cramped if not well-designed.
The L-Shaped Layout:
The L-shaped bathroom layout is a versatile choice that offers a balance between space efficiency and functionality. It involves arranging fixtures along two adjacent walls, forming an L shape. This layout provides enough room to incorporate a separate shower and bathtub, or even a combination shower-tub unit, along with a vanity area. The open space in the middle allows for easy movement and a sense of openness.
Pros:
Offers a good balance between functionality and aesthetics.
Provides room for separate shower and bathtub areas.
Opportunity to create a dedicated vanity space.
Cons:
Requires careful planning to ensure efficient use of space.
Plumbing and electrical considerations can be more complex compared to a single-wall layout.
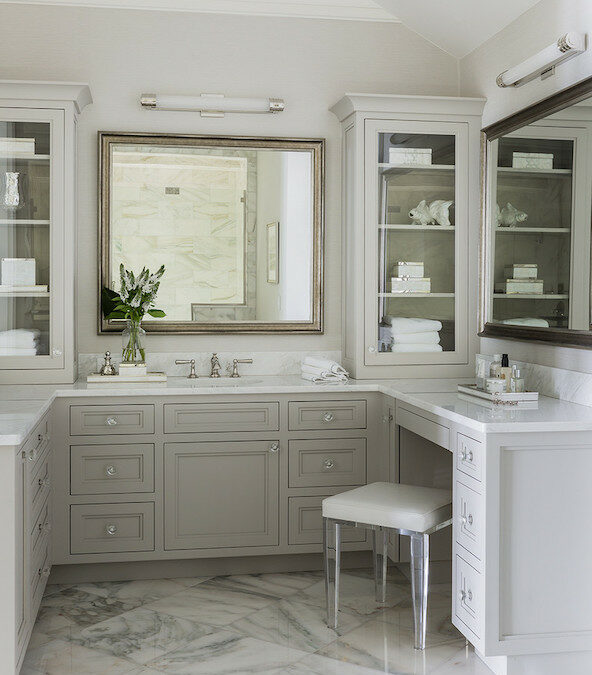
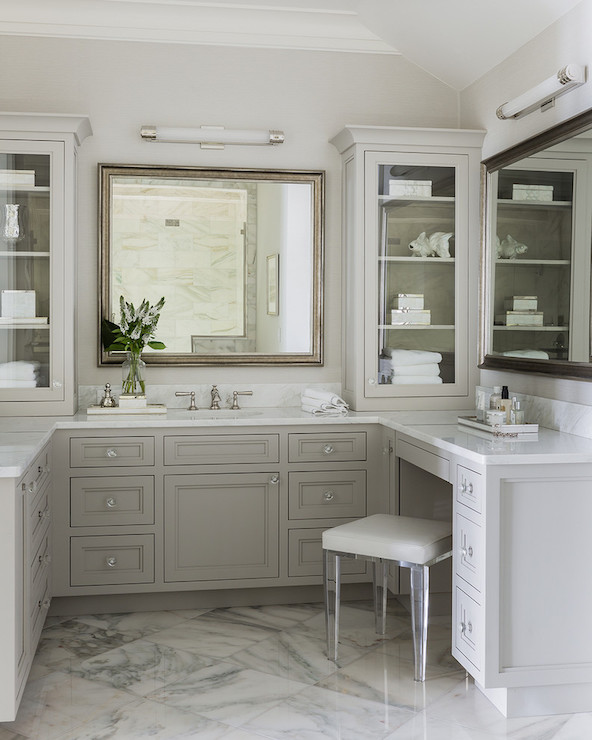
The Spacious U-Shaped Layout:
The U-shaped bathroom layout is a luxurious option suitable for larger bathrooms, where space is not a constraint. This layout involves placing fixtures along three walls, forming a U shape. The layout offers ample room for a separate shower, a freestanding bathtub, and a spacious vanity area. It provides a sense of grandeur and a spa-like atmosphere, making it perfect for creating a retreat within your home.
Pros:
Offers a high level of functionality and comfort.
Provides ample space for various fixtures and features.
Can accommodate creative design elements, such as a center island or seating area.
Cons:
Requires a larger space, which may not be feasible for all bathrooms.
More complex construction and design considerations.
When it comes to designing the ideal bathroom layout, there’s no one-size-fits-all solution. The choice depends on the size of your space, your lifestyle, and your design preferences. Whether you opt for the classic single-wall layout, the versatile L-shaped layout, or the spacious U-shaped layout, the key is to ensure that the chosen layout complements your daily routine while reflecting your personal style. By carefully considering your needs and consulting with professionals, you can create a bathroom that seamlessly combines functionality, aesthetics, and tranquility.
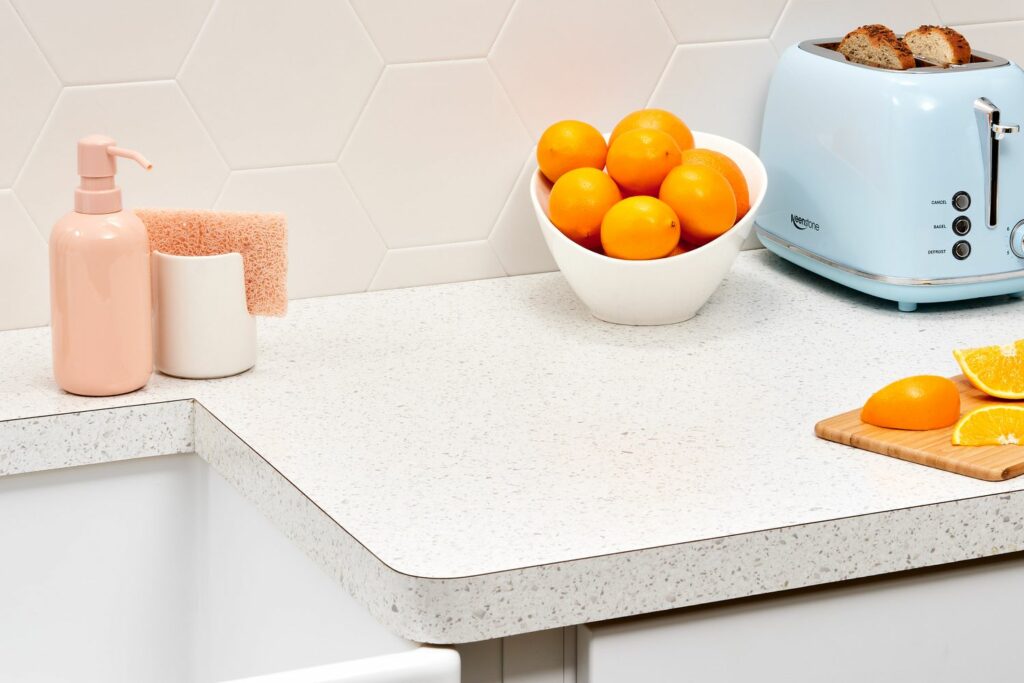
An organized and functional kitchen is the heart of a well-run home. With the right strategies and tools in place, you can transform your kitchen into a space that promotes efficiency, cleanliness, and a seamless cooking experience. In this article, we outline ten essential steps to help you achieve a kitchen that is both organized and highly functional.
Declutter Your Space:
Begin by decluttering your kitchen and getting rid of unnecessary items. Sort through cabinets, drawers, and countertops, and donate or discard items you no longer need or use. Removing clutter creates a clean and organized foundation for your kitchen.
PRO TIP: We suggest starting with one section at a time- no one eats an elephant in one bite! Take everything out of the cabinet- we mean EVERYTHING, then when you put it away only put back the things your family uses- make a donate pile – and make a seasonal/ not an everyday pile that might get stored away.
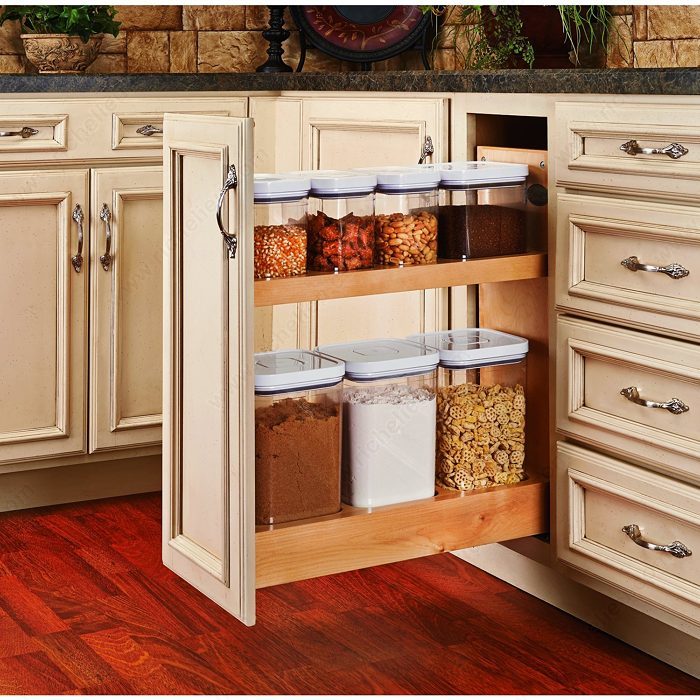
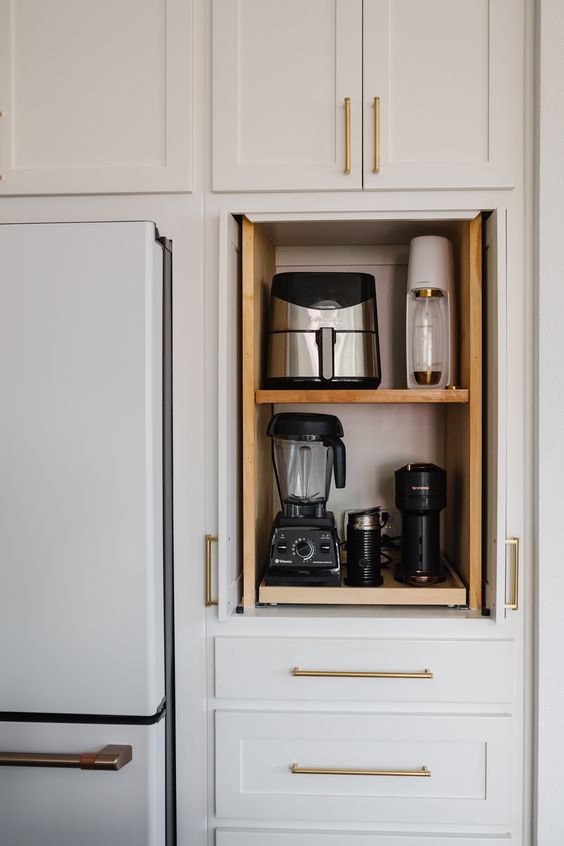
Maximize Storage:
Invest in smart storage solutions to make the most of your kitchen space. Utilize drawer dividers, stackable containers, and shelf organizers to optimize storage capacity. Consider installing additional cabinets or floating shelves if needed.
Arrange by Task
Organize your kitchen items based on Kitchen Tasks. Are you big on food prep for those busy work weeks? Keep all your food storage containers in an easy to access cabinet near your go to meal prep spot. Love to cook on the daily? Keep frequently used pots, pans, and utensils within easy reach near the stove. Always baking for your friends and family?Store baking supplies together in an easily accessible place so you can always whip up a fresh batch of brownies. This arrangement streamlines any tasks you need to take on in the kitchen.
Efficient Workflow:
Design your kitchen layout to support an efficient workflow. Place the refrigerator, sink, and stove in close proximity to create a functional triangle. This setup minimizes unnecessary steps and allows for smooth movement during food preparation.
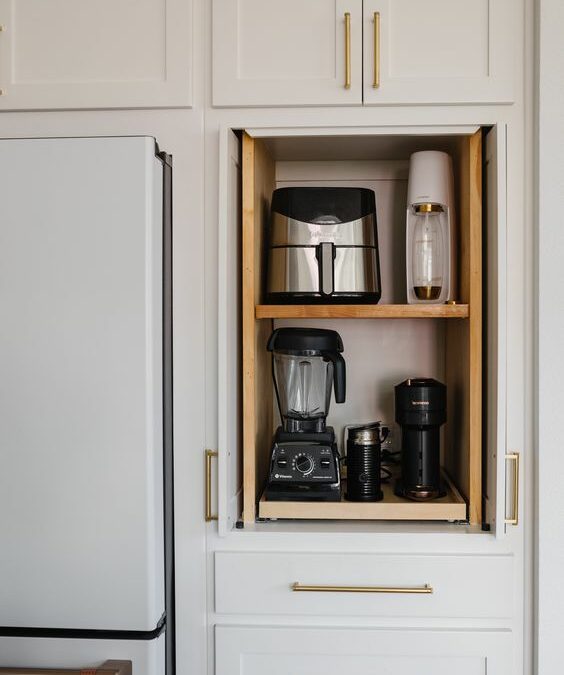
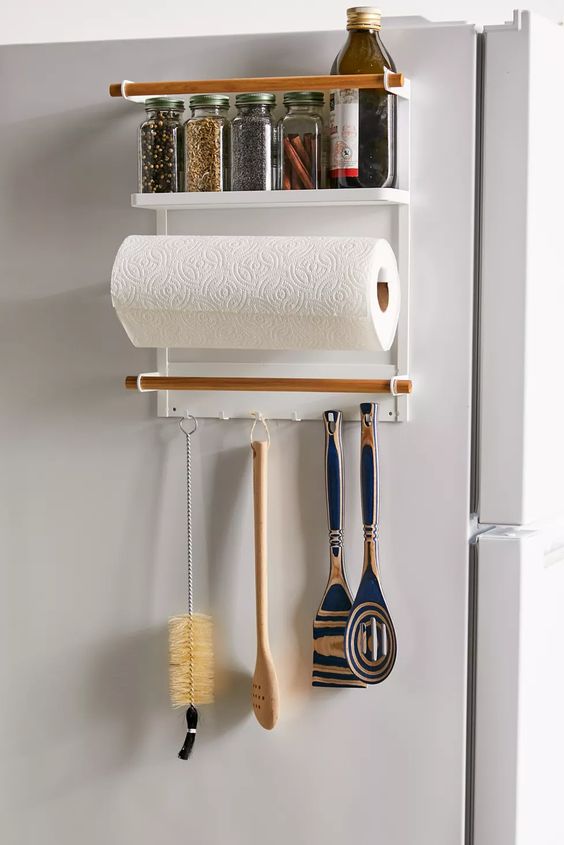
Utilize Vertical Space:
Make use of vertical space in your kitchen by installing hooks, racks, or magnetic strips on walls or cabinet doors. Hang frequently used utensils, potholders, or cutting boards to free up counter space and keep essentials within reach.
Label and Categorize:
Label containers, jars, and pantry shelves to maintain order and easily locate items. Categorize spices, canned goods, and dry ingredients for efficient meal planning and grocery shopping.
Keep Countertops Clear:
Clear countertops contribute to an organized and functional kitchen. Limit the number of items permanently stored on the counter and create designated storage spaces for appliances or utensils that are frequently used.
Maintain a Cleaning Routine:
Establish a regular cleaning routine to keep your kitchen tidy and functional. Wipe down surfaces, clean appliances, and sweep or mop the floor regularly. A clean kitchen enhances efficiency and prevents the accumulation of dirt and grime.
Invest in Quality Tools:
Equip your kitchen with high-quality tools and utensils that are durable and efficient. Invest in sharp knives, reliable cookware, and sturdy kitchen gadgets. Having the right tools on hand simplifies meal preparation and cooking tasks.
Regular Maintenance:
Maintain the organization and functionality of your kitchen by periodically reassessing and reorganizing. Conduct regular purges of expired or unused items and make adjustments to storage systems as needed.
Make sure to customize your kitchen to YOUR needs. If you spend more time ordering takeout than cooking, forgo some storage for seating! If you’re a master baker, consider working a double over into your design. Remember kitchens aren’t one size fits all. Embrace these strategies to create a kitchen that not only looks great but also supports a seamless cooking experience.
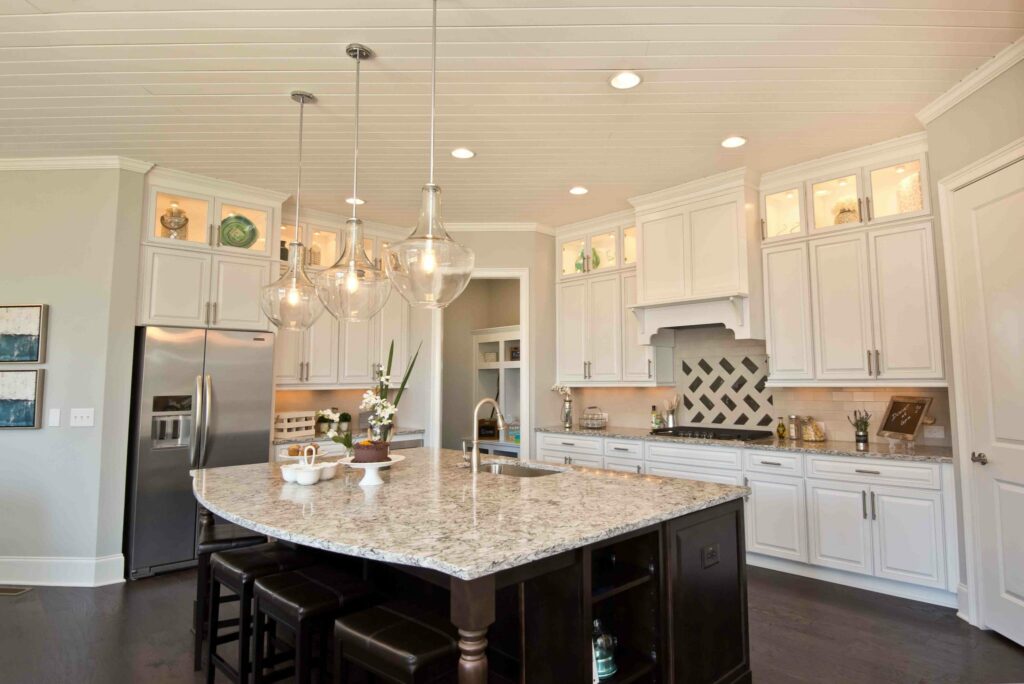
Upper cabinets can be a great addition to any kitchen, providing valuable storage space for plates, glasses, and other kitchen essentials. However, when it comes to choosing the right upper cabinets, there are several options to consider. Realistically considering your lifestyle, items you need to store and how you use your kitchen space.
42′ Upper Cabinets
For those with a lot of vertical space in their kitchen, 42” upper cabinets can be an excellent option. These cabinets are taller than the standard 30” or 36” cabinets, providing ample storage space for larger items or items that are used less frequently and a seamless look. The extra height can also give the kitchen a more grand and spacious feel.
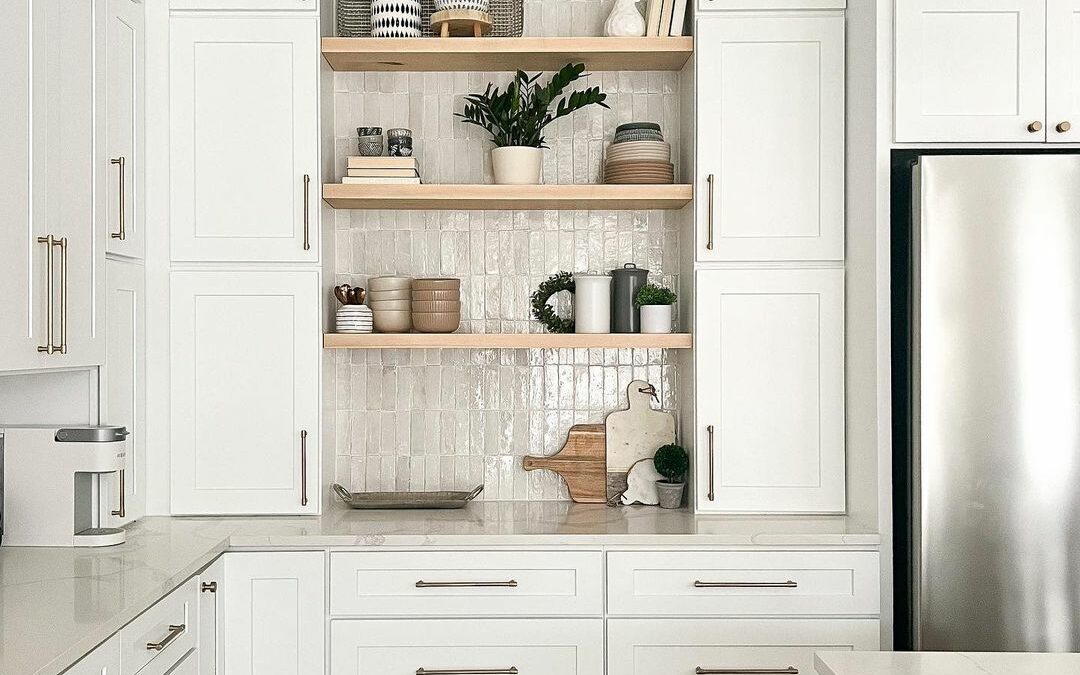
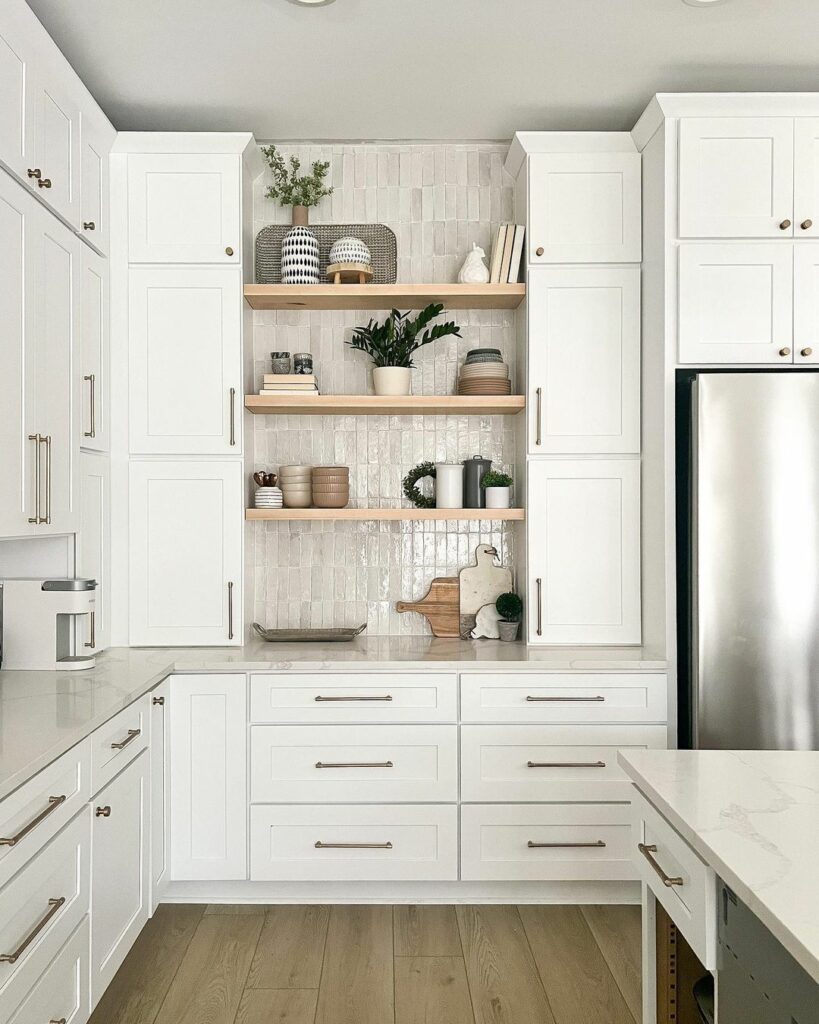
Open Shelving
Open shelving has become increasingly popular in recent years, and for good reason. It can provide a more open and airy feel to the kitchen while still providing ample storage space. Open shelving also allows you to display decorative items or your favorite dishes, adding a personal touch to your kitchen. This is a great option for Air BNB’s, guest’s won’t have to guess where things are!
Crown Molding
Crown molding is a decorative trim that can be added to the top of upper cabinets. It adds a polished look to the cabinets and can help tie the overall look of the kitchen together. Crown molding can be simple or ornate, depending on your preference, and can come in a variety of materials such as wood or MDF. One perk of crown molding is that it can close the gap between your upper cabinets and your ceiling, preventing dust and grime from accumulating on the top of the cabinets. Most people choose to go with 36’ or 39’ upper cabinets to alot for room for crown molding, but it depends on the height of your ceiling.
Glass Fronted Cabinets
Glass fronted cabinets are a great way to showcase your favorite dishes or decorative items. They provide a lighter, more open feel to the kitchen as the glass allows light to pass through. Glass cabinets can give you the creative space to add pops of color with decoration pieces. You can express your taste and add visual appeal with different textures or types of glass.
Feeling inspired? Reach out at our contact page to hear from one of our professional designers to learn more about your personalized options for your home!
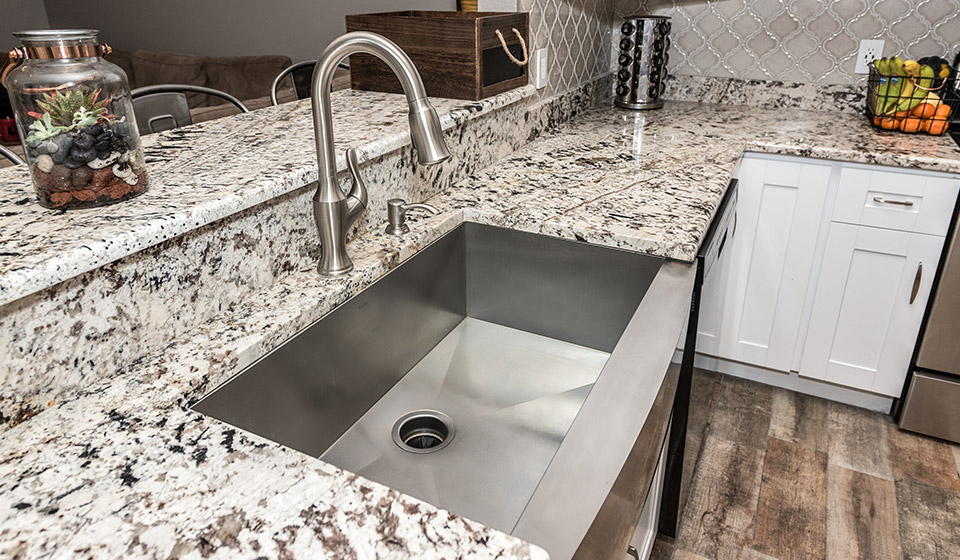
Choosing a countertop can be just as difficult as choosing your cabinetry! Before splurging on such a big update, take some time to read a little more about the material. Consider your lifestyle, budget and how long you need them to last.
The Top 4 Most Popular Countertop Materials
Quartz
Marble
Granite
Laminate
All of these are popular for a reason, let’s dive into the pros and cons!
Quartz – Quartz is a man made engineered surface largely composed of natural quartz and granite particles which makes up about 90% of the counter material. This substance is then paired with resins and polymers (as well as pigments, in some cases) to create a molded surface.
Pros
– Easy maintenance with no sealing required
– Uniform slabs with no imperfections
– Can be custom fabricated to any size and shape
– Resistant to stains
– Impervious to acid
– Naturally antimicrobial
Cons
– Very heavy in weight
– edges and corners can chip easily and must be repaired professionally
– noticeable seams in joined areas
– not as heat resistant as granite
Budget Type: High
Marble – A stunning natural stone that is entirely unique to each home.
Pros
– Waterproof and heatproof
– Adds real estate value to home
– Unique veining in each slab
– Will not yellow due to heat
Cons
– Can be scratched easily and difficult to repair
– Porous stone which stains easily and difficult to remove
– Needs to be sealed every few years
– Not sturdy enough for kitchens; heavy pots may chip or break off the slab
Budget Type: High
Granite – A purely natural stone that is sourced directly from stone quarries, defined by its elegance and timeless luxurious appearance.
Pros
– Can withstand very high heat temperatures
– Strong and durable
– Close to maintenance free (only needs to be treated with sealants)
– Resistant to cuts, scratches and stains (when cleaned quickly)
Cons
– Imperfections present due to the nature of natural stone
– Prone to cracks if stressed or not installed correctly
– Requires sealing to avoid permanent stains
– If you cut on the surface it may dull your knife
– Edges and corners can chip and must be professionally repaired or buffed
Budget Type: Mid to high
Laminate – Plastic coated synthetics made with laminate sheets and particleboard (MDF) core.
Pros
– Easy and low maintenance
– Thousands of pattern options available
– Durable against heat and stains
– One of the cheapest options available for countertops
Cons
– Cutting directly on it permanently damages the surface
Are you getting ready for a new project and need measurements? Have no fear, we’re here to take you through step by step so you can accurately map out your space without any headache! To begin, you will need:
tape measure
step stool or ladder
pencil
planning grid/scratch paper
calculator
laser measuring tool (not necessary, but can be used to double check measurements)
When measuring, you should be as precise as possible and take the measurements twice to ensure accuracy. Even rounding too far to the next fraction can be a costly mistake. All measurements should be written in inches.
How to Measure Step-by-Step
This step-by-step guide will ensure that homeowners will have the correct measurements for their new kitchen cabinets.
Make a Rough Sketch. The first step is to draw a rough plan of the existing kitchen, or the new blueprint if anything in the kitchen will be changed. The use of grid paper can make drawing the layout easier. All appliances, windows, and doors should be labeled. Electrical, plumbing, and vents should also be marked.
The layout drawing does not need to be perfect, but it should be clear and easy for your designer to understand.
Take Horizontal Measurements. You will need to measure the entire length of all the walls in the space. This is necessary so the designer knows how they can reconfigure the new cabinets. Measurements should be taken from wall edge to wall edge in order to get the total space. The measurements for openings like doors or windows are taken from one side of the trim to the other side of trim. The trim or molding around it are included in the measurement. If they are only replacing cabinets within the current layout, then measurements of the current cabinets should be included as well( see step 6). Tip: All of the numbers should be written clearly so they are legible later and rounded to the nearest one-sixteenth of an inch.
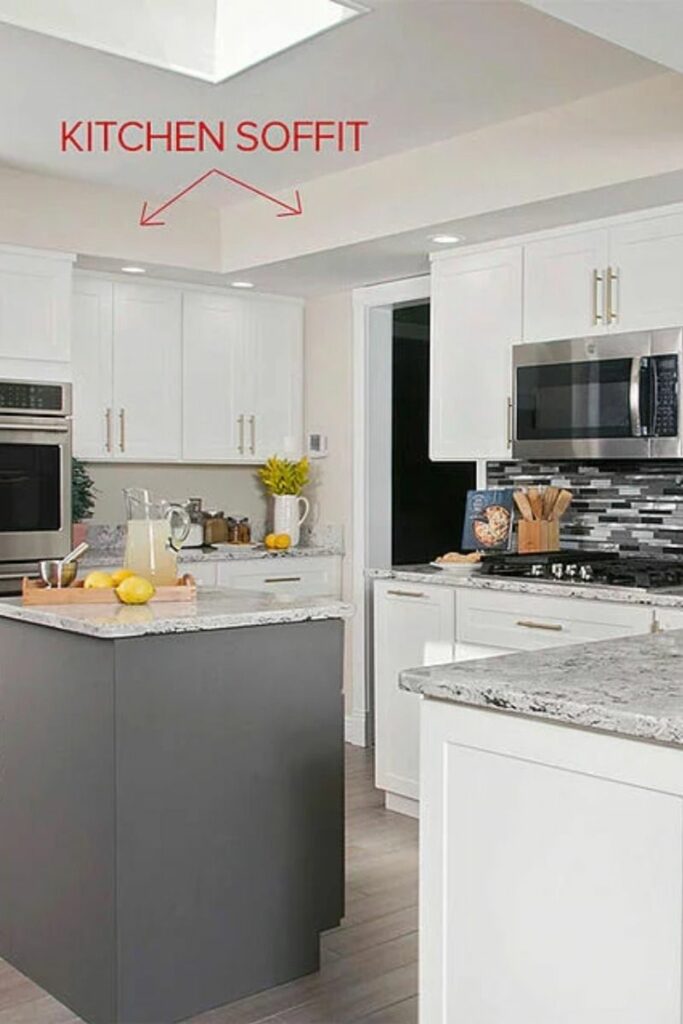
Take Vertical Measurements. The distance from floor to ceiling at each corner and the middle of each wall should be noted on the rough sketch. The house might have settled so it is important to measure several parts of the wall. The ceiling height indicated the ideal height of the upper cabinets. Measurements should take soffits into consideration. A soffit is a box-shaped structure that generally hides mechanical components between your cabinets and ceiling. If the kitchen has soffits, measure from the floor to the bottom of the soffit and please note the height of the soffit itself. Ceiling heights are normally 8 feet in older homes, and 9 feet in newer homes. Some homes might have even higher ceilings of 10 to 12 feet.
Find the Center Point of Existing appliances. Unless the kitchen layout is completely changing, existing features of the kitchen such as appliances, sink, and windows must be considered. You should measure the center point of all features. To find the center point of the sink or stove, start at the end closest to the wall and measure toward the sink or stove. The measurement stops at the middle part of the sink or center of the stove. If the sink or stove is located in an island, measure to the end of the island. For water and gas lines, measure from the wall to the center of the pipe or center of the appliance if it is still there.
Measure Doors and Windows. The same process should be completed for the windows and doors, the height and width should be recorded as well. Windows come in a variety of sizes, especially depending on the age of the home, so it is best to take kitchen window measurements twice. It is important to measure the distance from the bottom window trim to the floor. This measurement will let our designer know what type of cabinetry (if any) can go under the window.Make sure to include trim in all of your window and door measurements!
If you want to recreate your current layout: Measure Existing Cabinets. The existing cabinets should also be measured to see what will fit. You should measure the height, width, and depth to get an idea of what the current cabinets are and if that size will work for the kitchen renovation.
And there you have it! Send your measurements in to your cabinetry provider of choice (perhaps Ridge Cabinetry?) and begin the design process!
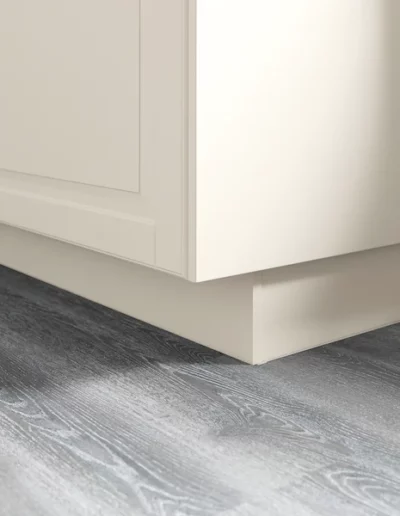
If you’re taking on a kitchen renovation, you’ll probably come across terms you haven’t heard before. We’re tackling some niche cabinetry lingo one by one to help you with your next project. First term we want to cover, toe kick.
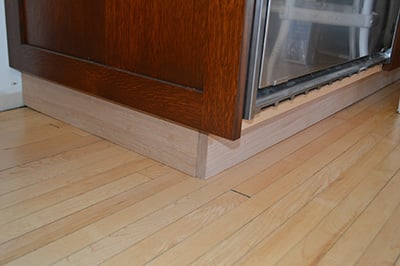
At the bottom of every base cabinet in your kitchen or bathroom, you’ll notice a recessed area between the bottom of the door and the floor. This area is called a toe kick, and it’s an ergonomic feature to make it more comfortable to work at the countertop or sink.
It gives you a spot to slide your toes under the cabinets without bumping into the front, so you can get up closer to your work. Without a toe kick, you’d have to bend forward and put strain on your back.
Most cabinet lines come with an unfinished bottom, showing the raw wood or particle board at the bottom. Toe kick in a matching finish or paint color allows for a cohesive, professional look.
One question we get a lot is what is a perfect toe kick height? The optimal height for a toe kick is about 4.5 inches, but it’s not uncommon to see a various size range in toe kicks. Taller sizes in toe kick are necessary when planning for cooks with varying abilities in your kitchen. If one of your cooks is wheelchair bound, a 9” toe kick will allow them to comfortably access the counter tops. Whereas the 4.5” provides an adequate recess to stand comfortably and maintain balance while working at a countertop, without sacrificing any visibility or workspace.
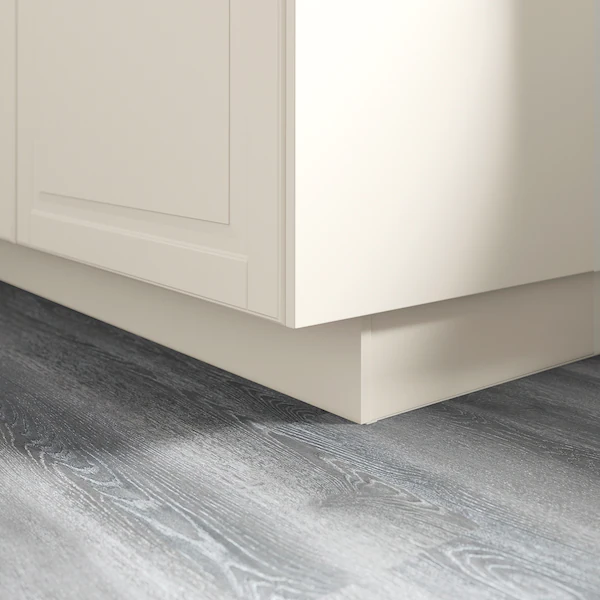
Finished toe kick
So, if toe kick is necessary why isnt it built in? Well, not all floors are perfectly level, and not all cabinet bases are perfectly level either. An important step in base cabinet installation involves shimming the cabinets to make sure they’re all level at the top. And those shims mean there might be a gap between the bottom of the cabinet, and the floor.
That’s where toe kick comes in. Because it’s a separate piece, you can trim it to the exact shape you need, to make sure there’s no gap, and to ensure that your cabinets look fully finished.
Stay tuned while we unpack common home renovations terms to help you sound like a pro on your next project!